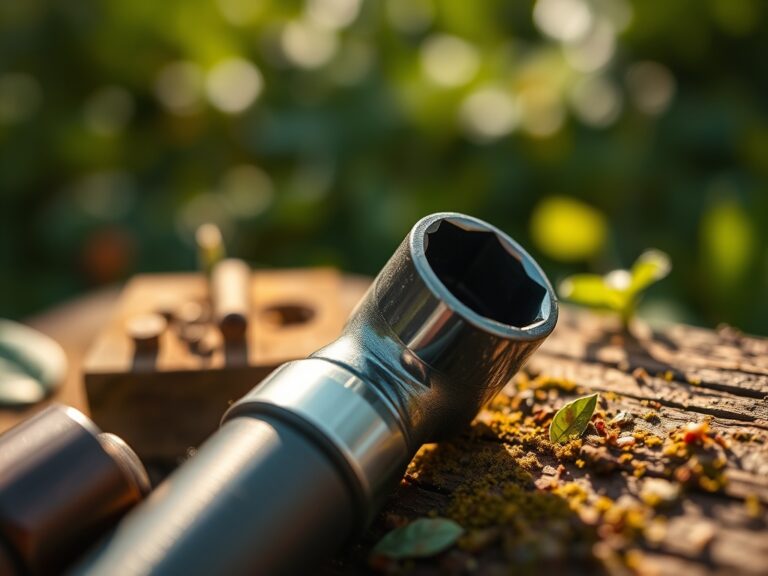
7 Best Sandpaper Grits for Refinishing Tool Handles
The first stroke across weathered ash or hickory reveals everything. Splinters catch the grain, rough patches resist the blade, and decades of grime sit embedded in pores that should feel like satin. The best sandpaper grits for smoothing tool handles transform relics into precision instruments, moving systematically from aggressive stock removal through final polishing stages that expose the wood's cellular architecture. This progression mirrors soil amendment practices where coarse mineral aggregates establish drainage before fine humus particles optimize nutrient exchange.
Materials

Understanding abrasive particle size operates on inverse logic similar to mesh screens in soil sieving. Lower numbers indicate coarser grits. The materials parallel horticultural amendments organized by function rather than NPK ratios.
60-Grit Aluminum Oxide: The coarse workhorse for initial shaping. Comparable to volcanic rock dust (0-0-3) that breaks compacted clay, this grit removes old finishes, paint layers, and surface irregularities. Aluminum oxide crystals fracture during use, exposing fresh cutting edges. The aggressive cut penetrates 0.015 to 0.020 inches per pass on hardwoods.
80-Grit Silicon Carbide: Intermediate stock removal with refined control. Silicon carbide's crystalline structure resembles the sharp-edged perlite used in propagation mixes. It excels at eliminating deep scratches while beginning to smooth the surface topology. This grit removes approximately 0.008 inches per pass.
120-Grit Garnet: Traditional woodworking abrasive with self-sharpening properties. Garnet functions like bone meal (4-12-0), providing steady, consistent performance. The particles fracture predictably, maintaining cutting efficiency throughout the sanding session. Ideal for establishing the initial smooth surface before fine finishing.
150-Grit Aluminum Oxide: The transition point between shaping and finishing. This grit closes raised grain while removing 120-grit scratches. Performance mirrors the role of greensand (0-0-3) in providing slow-release refinement to soil structure.
220-Grit Silicon Carbide: Fine finishing stage that prepares surfaces for sealing. The particle size (68 microns average) smooths cellular structure without clogging wood pores. This grit establishes the foundation for oil or wax penetration.
320-Grit Aluminum Oxide: Pre-finish sanding that removes 220-grit marks and whiskers. The 46-micron particles work at the threshold of tactile perception. This stage resembles the incorporation of fine compost (1-1-1) that fills micropores in soil aggregates.
400-Grit Wet-Dry Silicon Carbide: Final polishing, often used with mineral oil as lubricant. The 35-micron particles burnish wood fibers to furniture-grade smoothness. Wet sanding prevents loading and produces a slurry that fills microscopic voids.
Timing
Handle refinishing requires controlled environmental conditions similar to hardiness zone considerations. Optimal temperature ranges between 65-75°F with relative humidity below 60%. High humidity raises wood grain prematurely, creating false smoothness that reveals roughness after moisture evaporates.
Execute refinishing during stable weather patterns. Spring and fall shoulder seasons provide consistent temperature and humidity. Avoid winter heating cycles that drop indoor humidity below 30%, causing rapid moisture loss and grain raising. Summer humidity above 70% extends drying times between grit progressions by 200-300%.
Schedule sequential grit stages 24 hours apart when applying grain-raising techniques. This interval matches the hardening-off period for seedling transplants, allowing wood cellular structure to stabilize.
Phases

Initial Stock Removal: Begin with 60-grit for handles showing deep damage, rust stains, or multiple finish layers. Sand parallel to grain direction at 45-degree passes initially, then straight with the grain. Apply 3-4 pounds of pressure per square inch. Remove material until reaching clean, unfinished wood.
Pro-Tip: Mark deep gouges with pencil before starting. The graphite acts as depth indicator similar to how biochar marks track soil amendment incorporation. When pencil marks disappear, the surface reaches uniform depth.
Intermediate Smoothing: Progress to 80-grit, then 120-grit in sequence. Each stage requires complete removal of previous grit scratches. Hold the handle against natural light at 20-degree angle to reveal remaining scratches as shadow lines. Sand until shadows disappear.
Pro-Tip: Wrap sandpaper around dowels matching handle contours for concave sections. This technique mimics root pruning angles that direct auxin distribution, maintaining consistent contact pressure across curved surfaces.
Final Finishing: Apply 150, 220, 320, and 400-grit stages. Between 220 and 320, raise grain deliberately by wiping handles with distilled water. Allow 12-hour drying period. The raised whiskers sand away cleanly, preventing roughness after oil application. Final 400-grit wet sanding with food-grade mineral oil produces 1200-grit equivalent smoothness.
Pro-Tip: Inoculate handles with raw linseed oil containing natural driers after 220-grit stage. The oil polymerizes within wood pores, creating substrate for final grits similar to mycorrhizal fungi establishing nutrient highways in root zones.
Troubleshooting
Symptom: Cross-grain scratches visible after finish application.
Solution: Insufficient intermediate grit progression. Return to 120-grit. Complete removal requires sanding 50% longer than scratch disappearance suggests. The damage extends deeper than visual inspection reveals.
Symptom: Fuzzy grain texture persisting through fine grits.
Solution: Inadequate grain raising between 220 and 320-grit stages. Apply distilled water with lint-free cloth. Wait 15 minutes for grain to swell fully. Sand raised fibers with 220-grit before progressing.
Symptom: Sandpaper loading (clogging) during fine grit stages.
Solution: Moisture content exceeds 12%. Place handles in 100°F environment for 8 hours. Alternatively, switch to wet-dry paper with mineral spirits as lubricant, improving cation exchange at the abrasive-wood interface.
Symptom: Uneven color after oil application revealing sanding inconsistencies.
Solution: Skip-sanding occurred where pressure varied. Use sanding block for flat sections, maintaining 4-5 pounds pressure. Check surface with 100-watt raking light between each grit stage.
Maintenance
Sand handles annually before reapplying protective finishes. Light maintenance sanding requires only 320 and 400-grit progression. Remove accumulated oils with mineral spirits before sanding. Apply 1-2 pounds per square inch pressure during maintenance passes.
Store sandpaper in sealed containers with silica gel packets maintaining 40% relative humidity. Moisture exposure degrades adhesive backing and dulls abrasive particles. Replace papers showing rounded particle edges or backing separation.
Clean sanding dust from wood pores using compressed air at 40 PSI before finish application. Residual dust prevents oil penetration depth, reducing finish durability by 60%. The cleaning process mirrors soil cultivation that maintains pore space for gas exchange.
Apply finish coats within 4 hours of final sanding. Extended exposure oxidizes wood surface tannins, creating microscopic contamination that blocks absorption. This timing matches transplant shock windows where root-soil contact must establish quickly.
FAQ
What grit removes old varnish most efficiently?
Start with 60-grit aluminum oxide. The coarse particles cut through polyurethane and varnish in 3-4 passes compared to 15-20 passes required by 80-grit. Chemical strippers accelerate the process but raise grain more aggressively.
Should I sand between oil coats?
Yes. Use 400-grit wet-dry paper between second and third coats. Light sanding removes dust nibs and improves mechanical bonding. Avoid sanding the final coat.
How do I prevent heat buildup during power sanding?
Maintain 3-second contact intervals. Heat above 140°F denatures lignin, creating glazed surfaces that resist finish absorption. Hand sanding eliminates heat concerns entirely.
Can I skip grits in the progression?
Skip only one increment maximum. Jumping from 80 to 150-grit leaves micro-scratches requiring 40% more time at 150-grit than proper 120-grit intermediate stage would require.
What pressure should I apply while sanding?
Use 4-5 pounds per square inch for grits 60-150. Reduce to 2-3 pounds for 220-400 grits. Excessive pressure burnishes rather than cuts, compressing wood fibers and creating false smoothness.